(Are you writing/have you written a book, but you're not sure if it's actually ready to publish yet? You may want to start by reading my blog post "I Wrote a Book! Now What?" - From Rough Draft to Publication and Beyond in 16 Steps. But if you're sure your book is ready to publish in paperback form, read on.)
Are you interested in self-publishing your own paperback book on Amazon through KDP Print? (KDP Print is Amazon.com’s print-on-demand publishing service. They used to use CreateSpace, but that is closing up now, and authors' books are being moved to KDP Print.) Here’s how it works:
1.) Go to https://kdp.amazon.com/en_US/ and log in or sign up.
2.) Click on “Paperback" under "Create a new title” (see the screenshot below). KDP will walk you through the necessary steps and prompt you to enter the required information. Most of it is pretty basic.
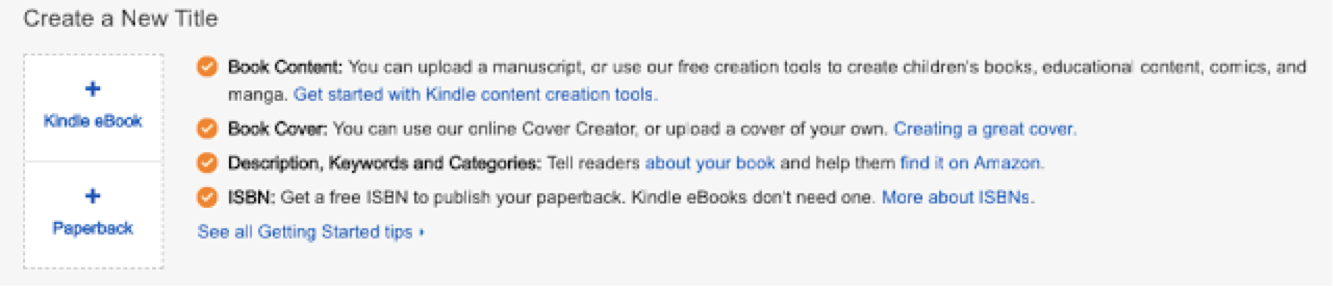
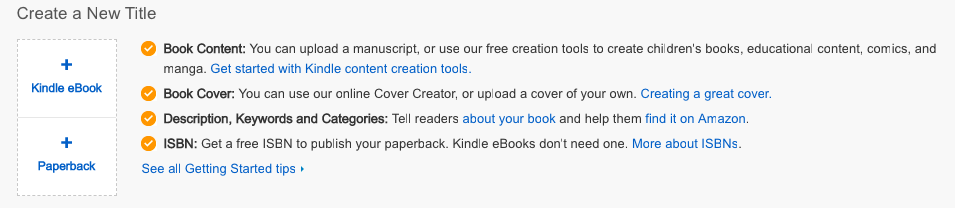
3.) When you come to the "Description" section, take your time and come up with a good one! This should be the same as the blurb on the back cover of your book and will be a major factor in customers' decisions as to whether or not to buy your book. Click here to read my blog post about blurb-writing resources.
4.) In the "Keywords" and "Categories" sections (see the screenshot below), you can select up to 7 keywords and 2 categories that will help customers find your book. Choose carefully! I recommend this article about selecting keywords and this one about categories to help you make the most effective use of these options. (The one about keywords also mentions a program called KDP Rocket that can help find good ones for you. It's on the pricey side but may be worth it if you plan to publish multiple books and/or don't have a lot of time to put into researching good keywords. I have it and can attest that it's a definite timesaver.)
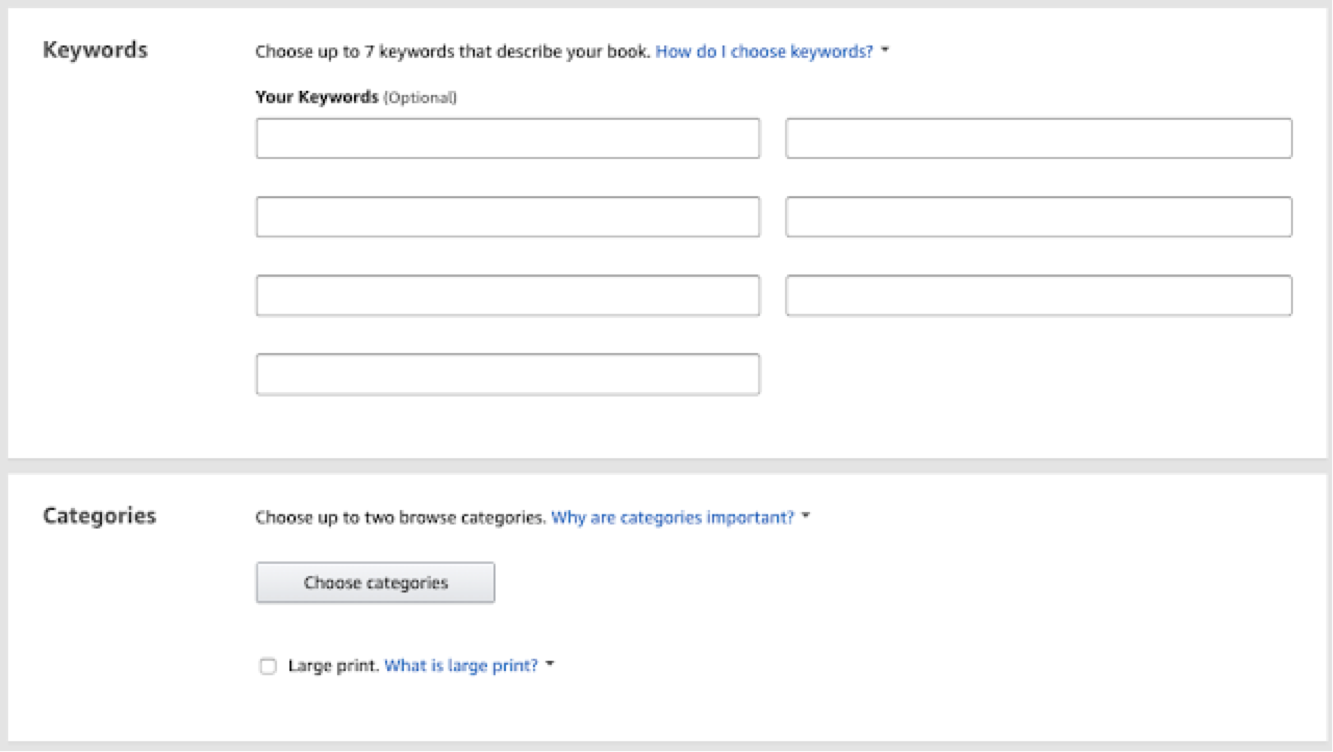
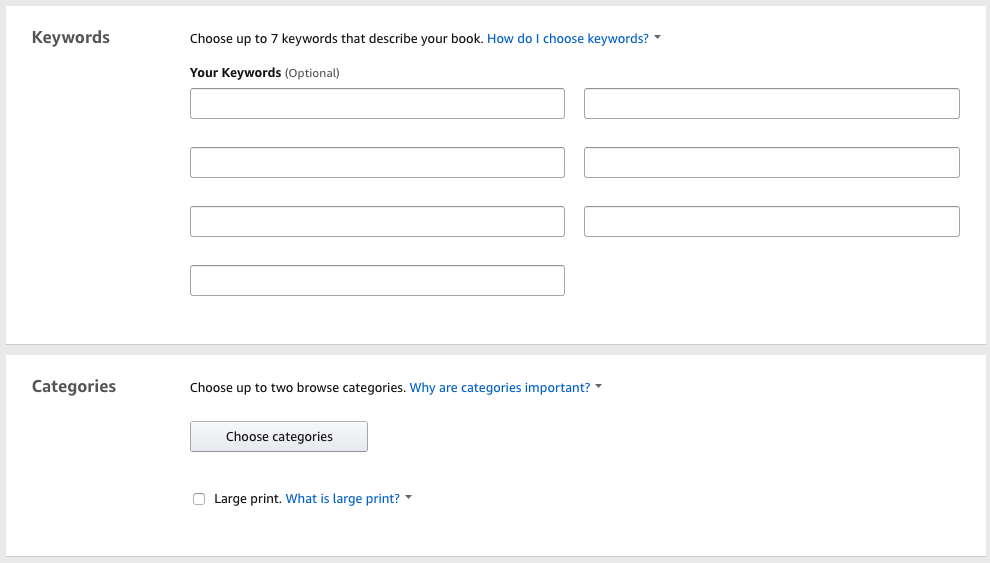
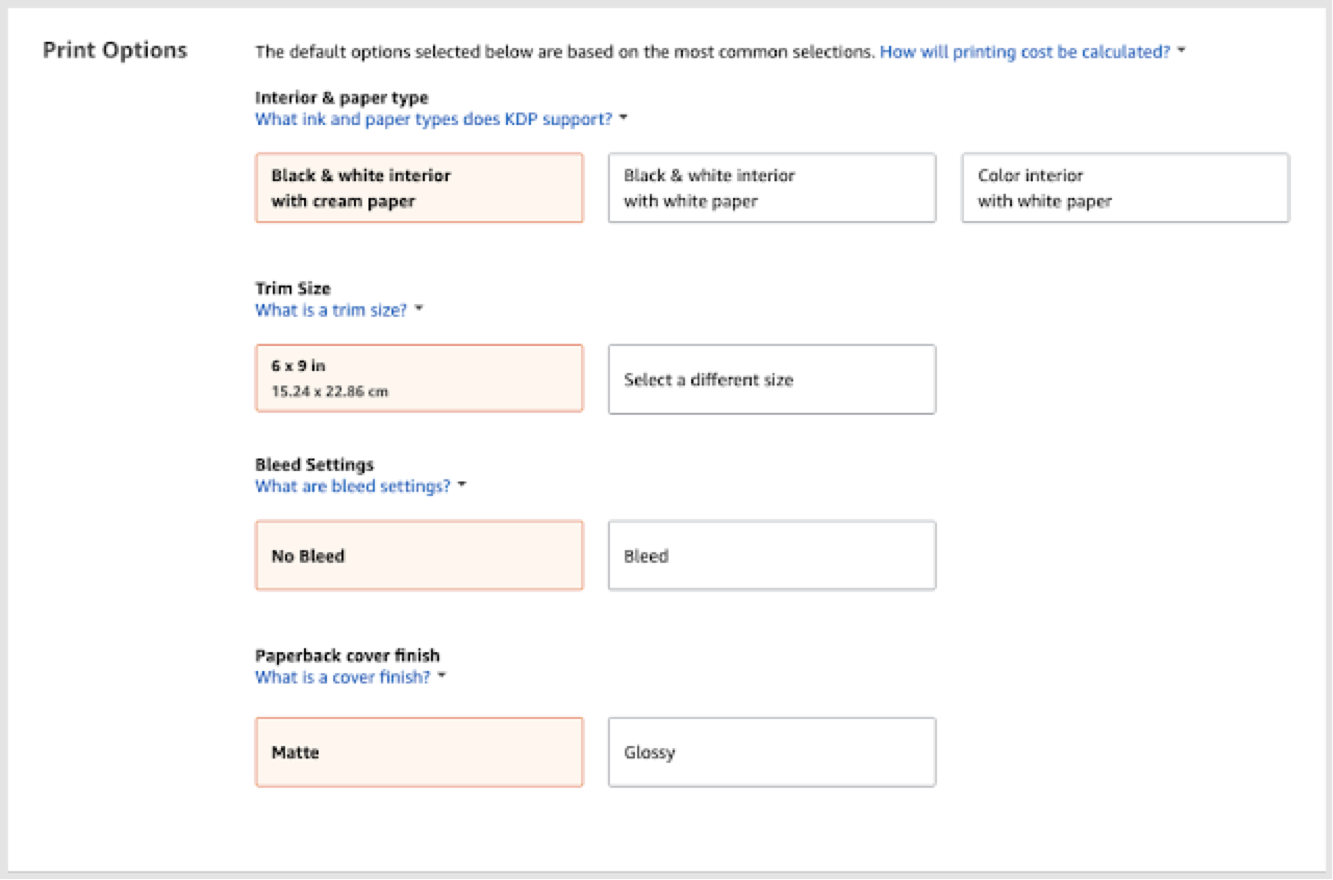
5.) In the "Print Options" section, KDP will select certain options for you by default (see screenshot below), but you can change them if you wish. Your trim size refers to the physical height and width of your book. "Bleed" can be confusing to first-time authors, but it relates to whether pictures or other designs in your manuscript extend past the margins or not. If you are publishing a picture book, coloring book, or anything with lots of interior art, I suggest choosing "bleed". (I learned that the hard way when creating my adult coloring book calendar). If your book consists only of text, with perhaps small graphics here and there that don't stretch close to the edge of a page, "no bleed" will probably work well for you. Make sure all your print options are the way you want them before you publish your book! Some options in your KDP Print settings can be changed later if you decide you want to, but you're stuck with those print options unless you delete your book from Amazon and start all over again.
6.) Before you come to the "Manuscript" section, you'll want to make sure your manuscript is totally formatted and ready for publication. Yes, you can always upload a new version later if you need to, but do yourself a favor and make sure you haven't forgotten anything important. Here are some formatting tips for before you upload your manuscript:
· Take a look at this useful article with some suggestions for front matter, which every book needs at the beginning.
· Make sure you have page numbers in your book, starting at 1 from the beginning of the first chapter (or prologue), not from the title page, table of contents, etc. Instructions for paginating correctly can be found here.
· And you'll need to make sure your manuscript is properly formatted; check out this article for some helpful instructions with lots of screenshots and videos.
· You'll want to make sure you avoid these Top Five DIY Book Layout Mistakes.
· Widows and orphans don't belong in a print book! Here's how to dispatch them if you're using Microsoft Word. (For other programs, sorry, you're on your own!). Open the document containing your book. Uncheck the box that says “Widow/Orphan Control” in the “line and page breaks” section of the “paragraph” menu. You will need to go through your document and check for widows and orphans manually (because the automatic widow/orphan control can cause other formatting problems). Widows are when a few words at the end of a paragraph appear as a partial line at the top of a page. Orphans are when a new paragraph begins on the very bottom line of a page. Both are considered unprofessional; you can try to get rid of them by deleting unnecessary words in a paragraph, rephrasing a sentence to make it a little longer or shorter, etc. For orphans, you can use the Enter key to move the paragraph onto the next page, thus ending one page a little above where others end. However, you should then do the same thing to the facing page so the two pages a reader will see at the same time match each other. If all else fails, you can fiddle with the kerning (making the words and letters in a certain line a little closer together or further apart). You can do this by first highlighting the line or paragraph of text you want to change, then clicking on the “Font” menu and choosing “Advanced”. Under “Character Spacing”, change the spacing to either expanded or condensed by 0.1 pt. If that isn’t enough, increase the amount a little at a time until the text fits the way you want it.
When everything seems perfect, save your document as a PDF. If you're using Microsoft Word, you can follow these instructions, and then upload that to the KDP Print site.
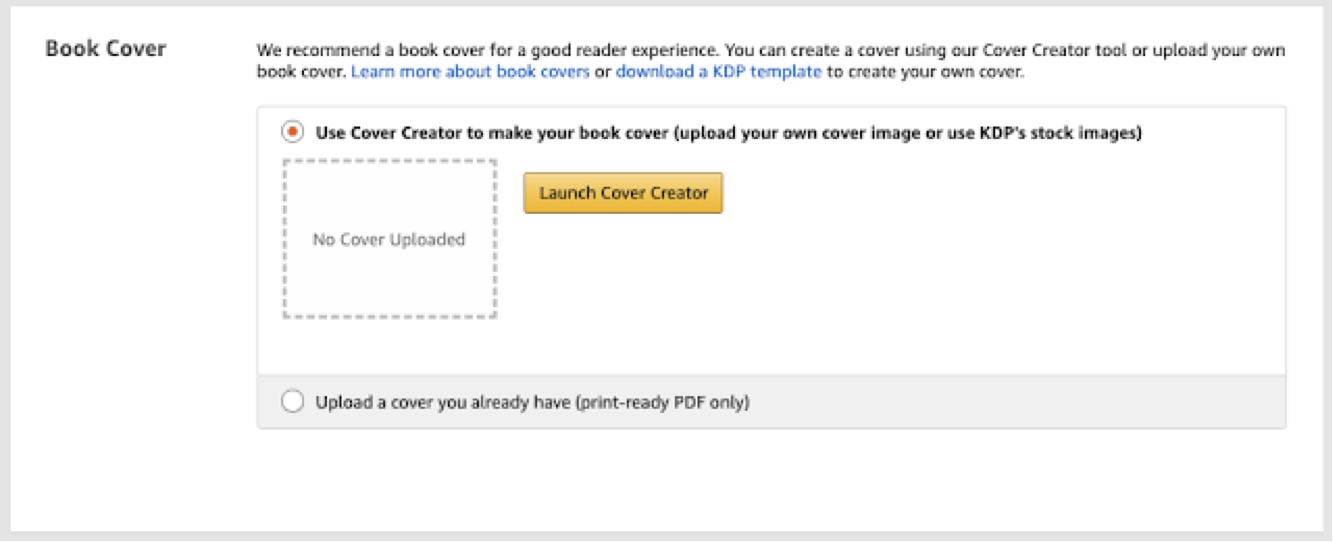
7.) Go on to the "Book Cover" section (see screenshot below) and click "Upload a cover you already have". Don't have a cover for your book yet? Take a look at this post on my blog about creating covers; it also includes a list of cover artists for hire. You can also make one right there; just click on the yellow "Launch Cover Creator" button to get started.
8.) At the bottom of the page, click "launch previewer" to see an online preview of how the interior of your published book will look. (It often takes a long time to load, especially if your book contains images, so you may want to grab a cup of coffee or something to read while you wait.) KDP will tell you if there are any errors you need to fix; if so, you must fix them and upload a new version of your document before proceeding. Even if it doesn't tell you anything is wrong, it's still a good idea to look through every page in the manuscript to make sure everything else looks the way you want it. Check for accidental blank pages, widows and orphans, inconsistent formatting, missing or incorrect page numbers, etc. Make any necessary changes in your document and then re-upload it. You'll have to go through the preview process again every time you do this.
9.) In the "Territories" section, rest assured that you hold distribution rights to your book in all territories (worldwide rights) unless you've ever signed a document giving up those rights.
10.) For "Pricing & Royalty", the list price is what shoppers will pay for your book. Take a look at the "Royalty" amount at the right to see how much you'll receive from each sale. For example, in the screenshot below, my book Prince of Alasia costs $9.99, and I receive $2.50 from each copy sold on Amazon.com. "Min. $8.73" means that that's the cheapest I could make the book, based on how much it costs to print a book of that trim size, page count, etc.) If you don't live in the United States, you may want to change the "Primary Marketplace" to one that matches your country of residence. For example, if you're in the United Kingdom, you would select Amazon.co.uk. I recommend enabling "Expanded Distribution", which makes your book available through other bookstores, libraries, etc. (though you get lower royalties from that than from copies sold directly through Amazon). If you click on "6 other marketplaces", you can manually change the price in other currencies for shoppers who may view your book on Amazon.fr, for example, if they live in France.

11.) You’re nearly done! I suggest clicking on the link at the bottom of the page to order a paperback proof copy of your book to look over before you make it available to the general public on Amazon. When you’re holding a physical book in your hands, it’s much easier to notice little details that may not be quite right. This Guide to Reviewing Your Book Proof gives some reasons why and some suggestions as to what to check for.
12.) If the proof copy looks good (or if it doesn’t, after you’ve resubmitted your files and received a new proof that does), go back to the KDP Print website and click on “Publish Your Paperback Book”. KDP will email you within 72 hours (though usually it's under a day) to let you know that your book is available on Amazon.
13.) If you wish to publish your book on Kindle (which I highly recommend!), you might find my other blog post, “How to Prepare and Upload Your Manuscript for Sale on Kindle without Hyperventilating”, helpful.
Many thanks to those whose websites, blogs, and good advice I borrowed from to create this list! I hope their input is as helpful to others as it has been to me.
If you discover any broken links, outdated information, etc. in the above list, I'd appreciate your letting me know so I can keep this information as current and useful as possible. Thanks!
2 Replies to “How to Prepare your Manuscript for Paperback Publication through KDP Print”
Thank you SO MUCH, Annie. I can do all this easily. I needed exactly this guide. You ROCK! Sharing!Best to you,Sally Ember, Ed.D.
Bookmarked. Thank you.:)